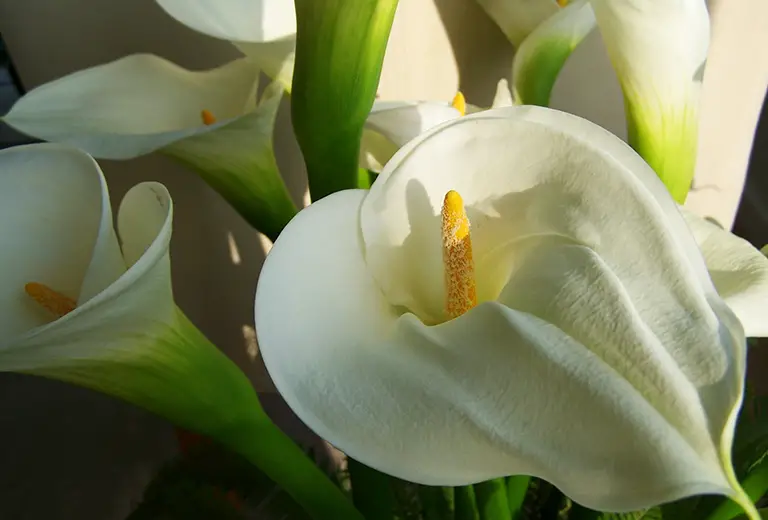
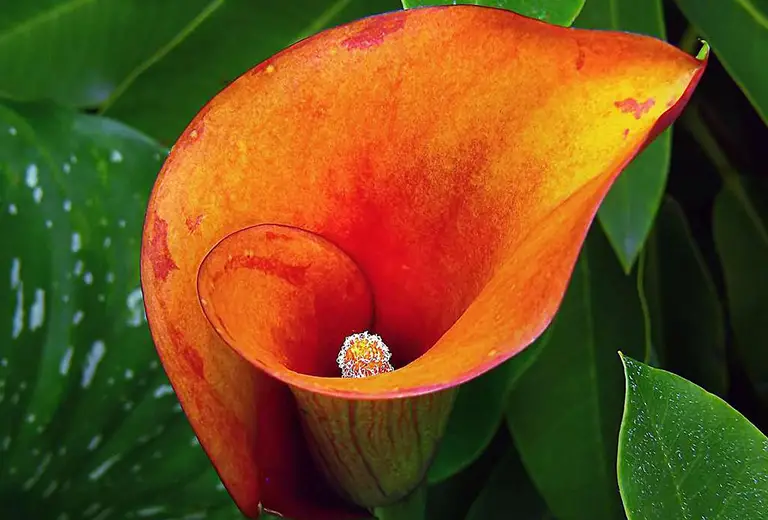
Calla lilies (Zantedeschia spp.) add sophistication and elegance to gardens with their colorful chalice-like flowers. Depending on the variety, blooms range in colors or pink, white, bi-colored, purple, salmon and yellow. The arrowhead-shaped foliage can be just as showy in solid green or speckled or spotted.
Calla lilies grow well in Florida as long as you plant them at the right time. The best time to plant white calla lilies is during winter and early spring. Pink and yellow calla lilies grow best in spring and early summer. Plant in a site that you can keep well watered and receives plenty of sunlight.
Plants are hardy growing in USDA zones 8 to 10, making them suitable for Florida gardeners provided they receive the cultural conditions they require for good growth.
Best Time to Plant Calla Lilies in Florida
Planting calla lilies at the appropriate time in Florida is essential in getting those fabulous blooms and producing healthy plants. When you plant depends on which variety of calla lily you are growing.

White calla lilies (Zantedeschia aethiopica) form into lush clumps of foliage growing 2 to 3 feet tall. As the name suggests, the blooms produced are white and quite showy. These are the calla lily flowers that are quite popular with the cut flower industry. The best time to plant white calla lilies in Florida is during winter or early spring.
On the other hand, yellow calla lilies (Zantedeschia elliottiana) and pink calla lilies (Zantedeschia rehmannii) perform better planted in spring and early summer. Pink calla lily plants typically grow around 1 to 1.5 feet tall and yellow calla lily plants are larger, growing up to 3 feet tall.

Best Places to Buy Calla Lily Bulbs
When it comes to purchasing calla lily bulbs, rhizomes from plants grown in the state is best, as these plants have grown and are used to thriving in the state’s conditions. If you have a neighbor or friend who happen to have them growing in the garden see if they’ll give you some of theirs.
However, if getting locally grown calla lily bulbs or rhizomes isn’t possible you can find a wealth of plant sellers that sell them. You can most likely find them at your local garden center prepackaged and ready to plant.
Otherwise, take to the internet and you’ll find a wealth of calla lily bulbs in a rainbow of different colors for sale. It’s best to purchase them around the time you plant on planting them so they don’t have to hang out in their package for too many months.
Best Place to Plant Calla Lilies
When it comes to where to plant your calla lilies you need to first know the cultural conditions that the plant prefers for healthy growth. Calla lilies prefer rich soils that remain moist, as this can be problematic to much of the state where soil conditions are sandy. In their native environment, they flourish growing along riverbanks and streams.
They also like sun to produce the best growth and production of flowers. This again can be a problem if your soil is sandy, as the sunny conditions further dry things out. Without amending with organic materials, sandy soil quickly dries and doesn’t have a tendency to remain moist for too long.
This leaves the Florida gardener with two choices on where to plant their calla lilies – in the garden or in containers.
Planting Calla Lilies in the Garden
If you have a garden area that is rich in organic materials, has the ability to remain moist and located in sun, you can plant the rhizomes directly in the ground with success. If your area of Florida gets extremely hot during the afternoon, plant the calla lilies in a location that receives a bit of filtered sun during the hottest part of the day.
Selecting an area that receives the most amount of daily sun while the soil retains its moisture is ideal.
If your soil conditions are a bit less than ideal, you can amend the area with organic matter before planting.
To make the soil more fertile, spread around 6 inches of sphagnum peat, compost or well-rotted manure over the planting site. Work the organics into the soil about 6 inches. These amendments help add organic matter into the soil, as well as assist the soil in its moisture retention.
However, if you live in northern portions of the state and your soil is clay, add peat moss, wood chips or shredded wood to the planting site. They will loosen the soil, as well as adding additional organic matter. Layer the area with about 3 inches of the amendments and work into the soil about 6 inches.
Once you have the planting site prepared, plant the rhizomes about 4 inches deep. Space multiple rhizomes about 1 to 2 feet apart.
Planting Calla Lilies in Containers
If your garden conditions are less than ideal and you want to be sure the calla lilies grow, you can successfully grow them in containers. You’ll have to probably water plants more frequently than those grown in the ground, as potting mixes dry out faster in pots. The end result of the attractive foliage and showy flowers is worth the extra work.
Select a container that has bottom drain holes. One rhizome will grow well planted in an 8-inch or 1-gallon pot. Fill the container with a fertile potting mix and water to settle the soil, adding more if needed. Plant the rhizome about 1.5 inches deep and water the soil again.
One you’ve planted the rhizome, place the entire container inside a larger but shorter one that will hold water. Set the containers in a location receiving full sun and fill the bottom one with an inch or two of water.
How to Care for Calla Lilies in Florida
When it comes to caring for your Florida calla lilies, making sure they receive adequate moisture is their biggest need. The other aspect of care is giving plants proper feedings and pruning at the proper time.
Water Requirements
Florida weather conditions can be hot and dry, especially during summer and soil dries quickly. This can mean you’ll need to water your plants daily, especially if you live in southern portions of the state.
You can feel the soil and if it’s starting to feel dry, water the planting site deeply, making sure the moisture reaches the roots. Adding several inches of organic mulch will assist the soil in retaining its moisture. It also helps cut down on unwanted weed growth.
If your calla lilies are growing in pots, check the soil regularly for its moisture content, especially when outdoor conditions are hot and dry. You can easily check the pot’s moisture by sticking your finger into the potting soil. If the top inch is starting to feel dry, water until it runs from the bottom drain holes.
Additionally, if you have the pot of calla lilies sitting in another water-filled container, make sure the container always holds an inch or two of water. Due to mosquitoes love of the state, you probably want to flush the water out of the bottom container frequently so the biting pests don’t decide to turn it into a nursery.
Reduce water amounts during winter while the plant goes dormant. You’ll see the foliage starting to yellow and brown, eventually dying. This is the sign your lily is going dormant. You can cut back water to every three weeks or so. Start watering again in spring when new foliage starts emerging.
Fertilizing
When it comes to fertilizing your Florida calla lilies, wait until they’ve germinated before feeding them. Calla lilies take around eight weeks to germinate and produce their first bloom and properly feeding produces healthy, bloom-producing plants.
Once the plant has germinated, feed calla lilies planted directly in the garden and in a container using a water-soluble blend for houseplants. Use something like a 12-4-8 blend applied according to package directions. More is not better as you run the possibility of burning the plant. Fertilize monthly while plants are actively growing.
Stop feeding the calla lily in winter while the plant is dormant and stops growing. One spring arrives and the rhizome sprouts new growth, you can start feeing plants again.
Pruning
Like all plants that grow from bulbs, rhizomes are still receiving nutrients from the foliage until it becomes totally brown and dies. Therefore, don’t prune off any of the spent leaves until they completely die. In Florida, you can leave the rhizomes in the ground year-round.
However, once the flowers are spent you can trim off the flower stalk before it starts producing a seedpod. The seeds rob energy from the rhizome and cutting them off won’t injure the plant.
Always use clean pruning tool blades when trimming, which is as easy as wiping the blade off with alcohol. You don’t want to transfer a pest or disease to your calla lilies.
Common Calla Lilly Pests in Florida
The most common pest of calla lilies grown in Florida are slugs, snails and whiteflies. The slugs and snails will eat the foliage and whiteflies suck out the plant’s juices weakening it and opening it up to health problems and possible death.
Whiteflies are easy to identify as giving the plant a little shake sends the tiny, white flying pests hovering into the air above the foliage. You might even notice fine webbing covering the foliage and these spider-like webs are where the pest earns its common name.
The plant’s foliage quickly turns yellow as the spidermites suck out its juices. Spidermites can quickly damage a calla lily so quick treatment is needed. You can spray plants off with a strong stream of water. Then, you’ll need to cover the foliage by spraying it with an insecticidal soap spray or neem. Don’t spray it when outdoor conditions are extremely hot and sunny or you can burn the foliage. Wait until late in the afternoon when conditions are cooler.
If slugs or snails are feasting on the foliage, you can set up beer traps to lure them away and kill them. Fill a small container like a tuna can with beer and set it close to the calla lily. The beer attracts the slugs and snails, they’ll crawl over the side to get to it, fall into the beer and drown.
The best way to keep your Florida calla lilies pest-free is to frequently check plants for potential problems. When selecting an insecticide, always make sure it’s safe for use on calla lilies and apply according to label directions.
